▩▩▩▩▩▩▩ WEEK 8 ▩▩▩▩▩▩▩
Reframing my Proposal
After submitting my RPO for formative feedback, I revisited it and found myself lost. Firstly, my
introduction seemed lackluster and failed to effectively convey my research. It left room for ambiguity
and did not provide a clear roadmap for my study. Additionally, I struggled to establish a coherent
connection between my research method and objectives. Furthermore, as I scrutinized my RPO, I noticed that
I had a surplus of 150 words. This extra word allowance presented an opportunity for me to expand on my
key points.
I've developed a comprehensive checklist to guide the effective utilization of language in articulating my
research. In the introduction, I aim to provide a clear problem statement and emphasize the significance
of my proposed solution:
When summarizing existing research, my goal is to bolster my understanding and categorize it into three
core pillars. The research objectives encompass two primary elements: promoting algorithm awareness and
knowledge
acquisition. I also underscore the role of speculative design in prompting critical reflection rather than
furnishing immediate solutions. In the 'Approaches and Methods' section, my intent is to rationalize the
choice of a critical journal
approach as the most suitable method for my speculative prototyping. By ticking off this checklist, I'm
confident that my research proposal will be both clear and concise.
Challenges with Ideation
The ideation process has proven to be quite challenging. Creating a speculative prototype entails checking
numerous boxes to ensure its true speculative nature. To effectively stimulate critical thinking, I delved
into a plethora of references that touch upon human psychology and behavior. Simultaneously, I've been
striving to gain a comprehensive understanding of the current perspectives on algorithm curation.
However, I've also encountered some limitations stemming from the computational nature of the atelier.
Many of my ideas demand a strong grasp of coding, and the format I've opted for feels more like a personal
preference rather than a strategic choice for the prototype. My motivation is to leverage this opportunity
to familiarize myself with TouchDesigner, as I see its substantial potential for future interdisciplinary
collaboration. The challenge I'm currently facing is that becoming proficient with TouchDesigner requires
a significant investment of time.
In the past, my approach to 'making' in computational projects significantly differed from my approach in
other projects. This difference can be due to my lack of experience with non-traditional computing
software. My initial plan, which was to generate one idea for each of the listed dilemmas, hasn't yielded
the desired results. Consequently, I've opted for a shift in strategy. Instead, I'll allow ideas to emerge
serendipitously as I become more acquainted with TouchDesigner. During this learning process, I also
aspire to craft small experiments, thereby enriching the quality of my catalogue of making.
A list of abandoned ideas
Learning TouchDesigner &
Small Experiments
In all of my experiments, I've consistently employed the same approach. When I engage with tutorials, my
focus is on identifying and documenting the parameters that directly impact the final result. I've
discovered that this method is more efficient than gradually comprehending the function of each parameter
within every operator.
For each of the experiments listed below, I will meticulously record my key takeaways and learning points.
A glimpse into my saved tutorials
Experiment 4 – Image Instancing
In this experiment, I delved into the concept of instancing, a technique that involves generating multiple
copies of an object using a single render call. This computational approach not only conserves GPU and CPU
resources but also contributes to smoother frame rates.
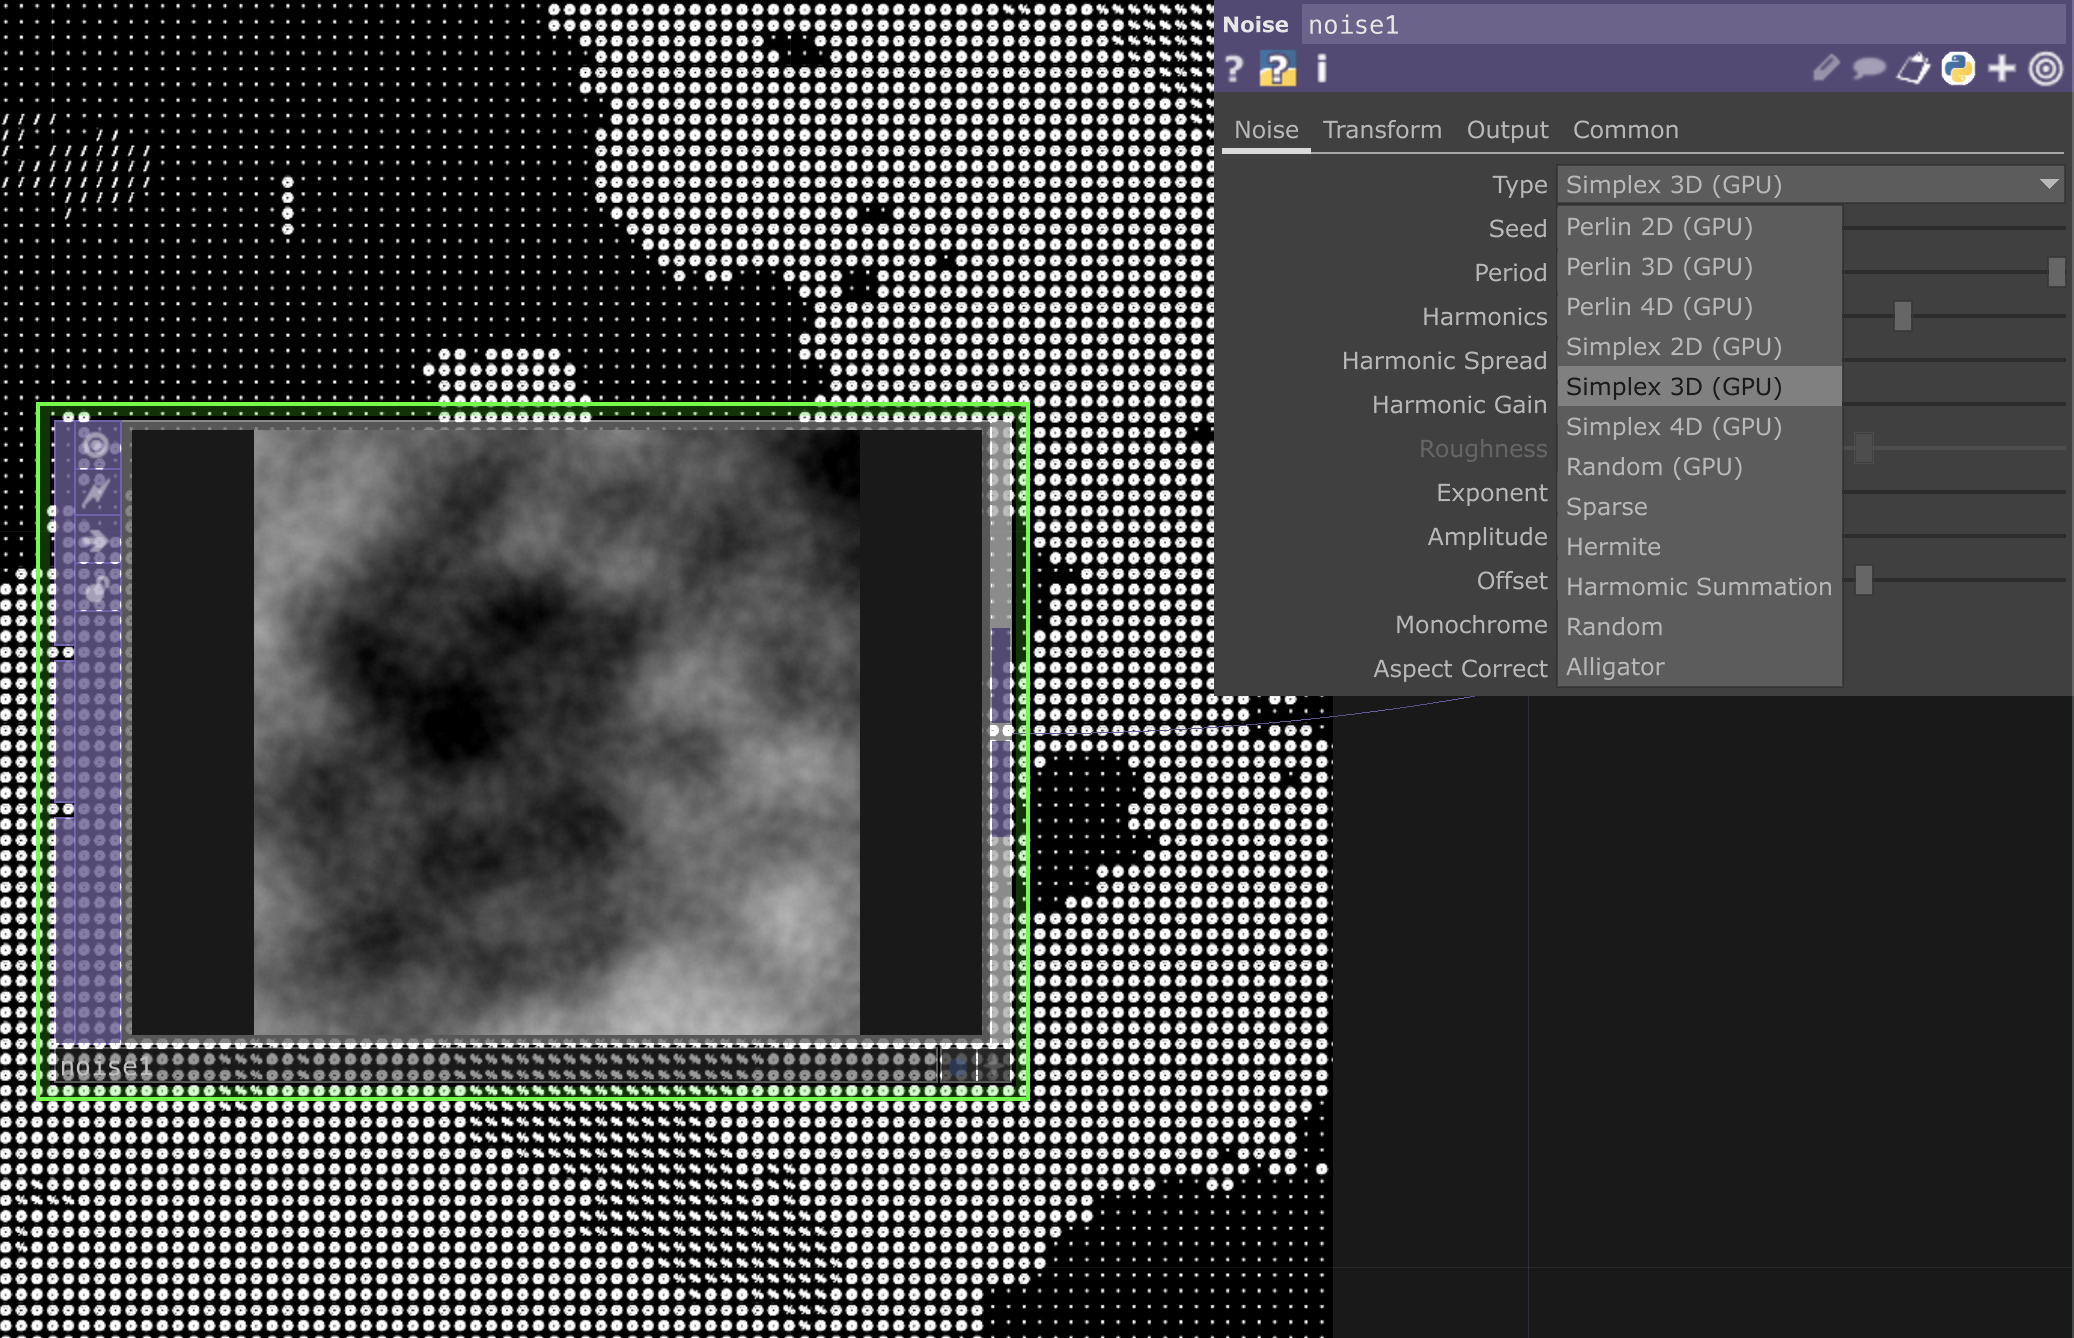
My exploration extended to a comprehensive understanding of the parameters within the noise function,
encompassing both CHOP and TOP variants. Additionally, I found the feedback OP to be pivotal in creating a
feedback effect, one that could be influenced by the blur and ramp OP.
Through experimentation with the parameters of the blur and feedback OP, I achieved markedly diverse
outcomes. By adjusting these parameters, I could make the feedback appear more fluid and even produce a
captivating kaleidoscope effect in the background. The noise CHOP function played a crucial role in
functioning as a control mechanism, allowing for adjustments to the speed, quantity, and path of the
images.
I noticed that noise is used a lot for abstract visuals, but personally, I would prefer a more controlled
rather than random input. So I’ll keep a look out for what can achieve that.
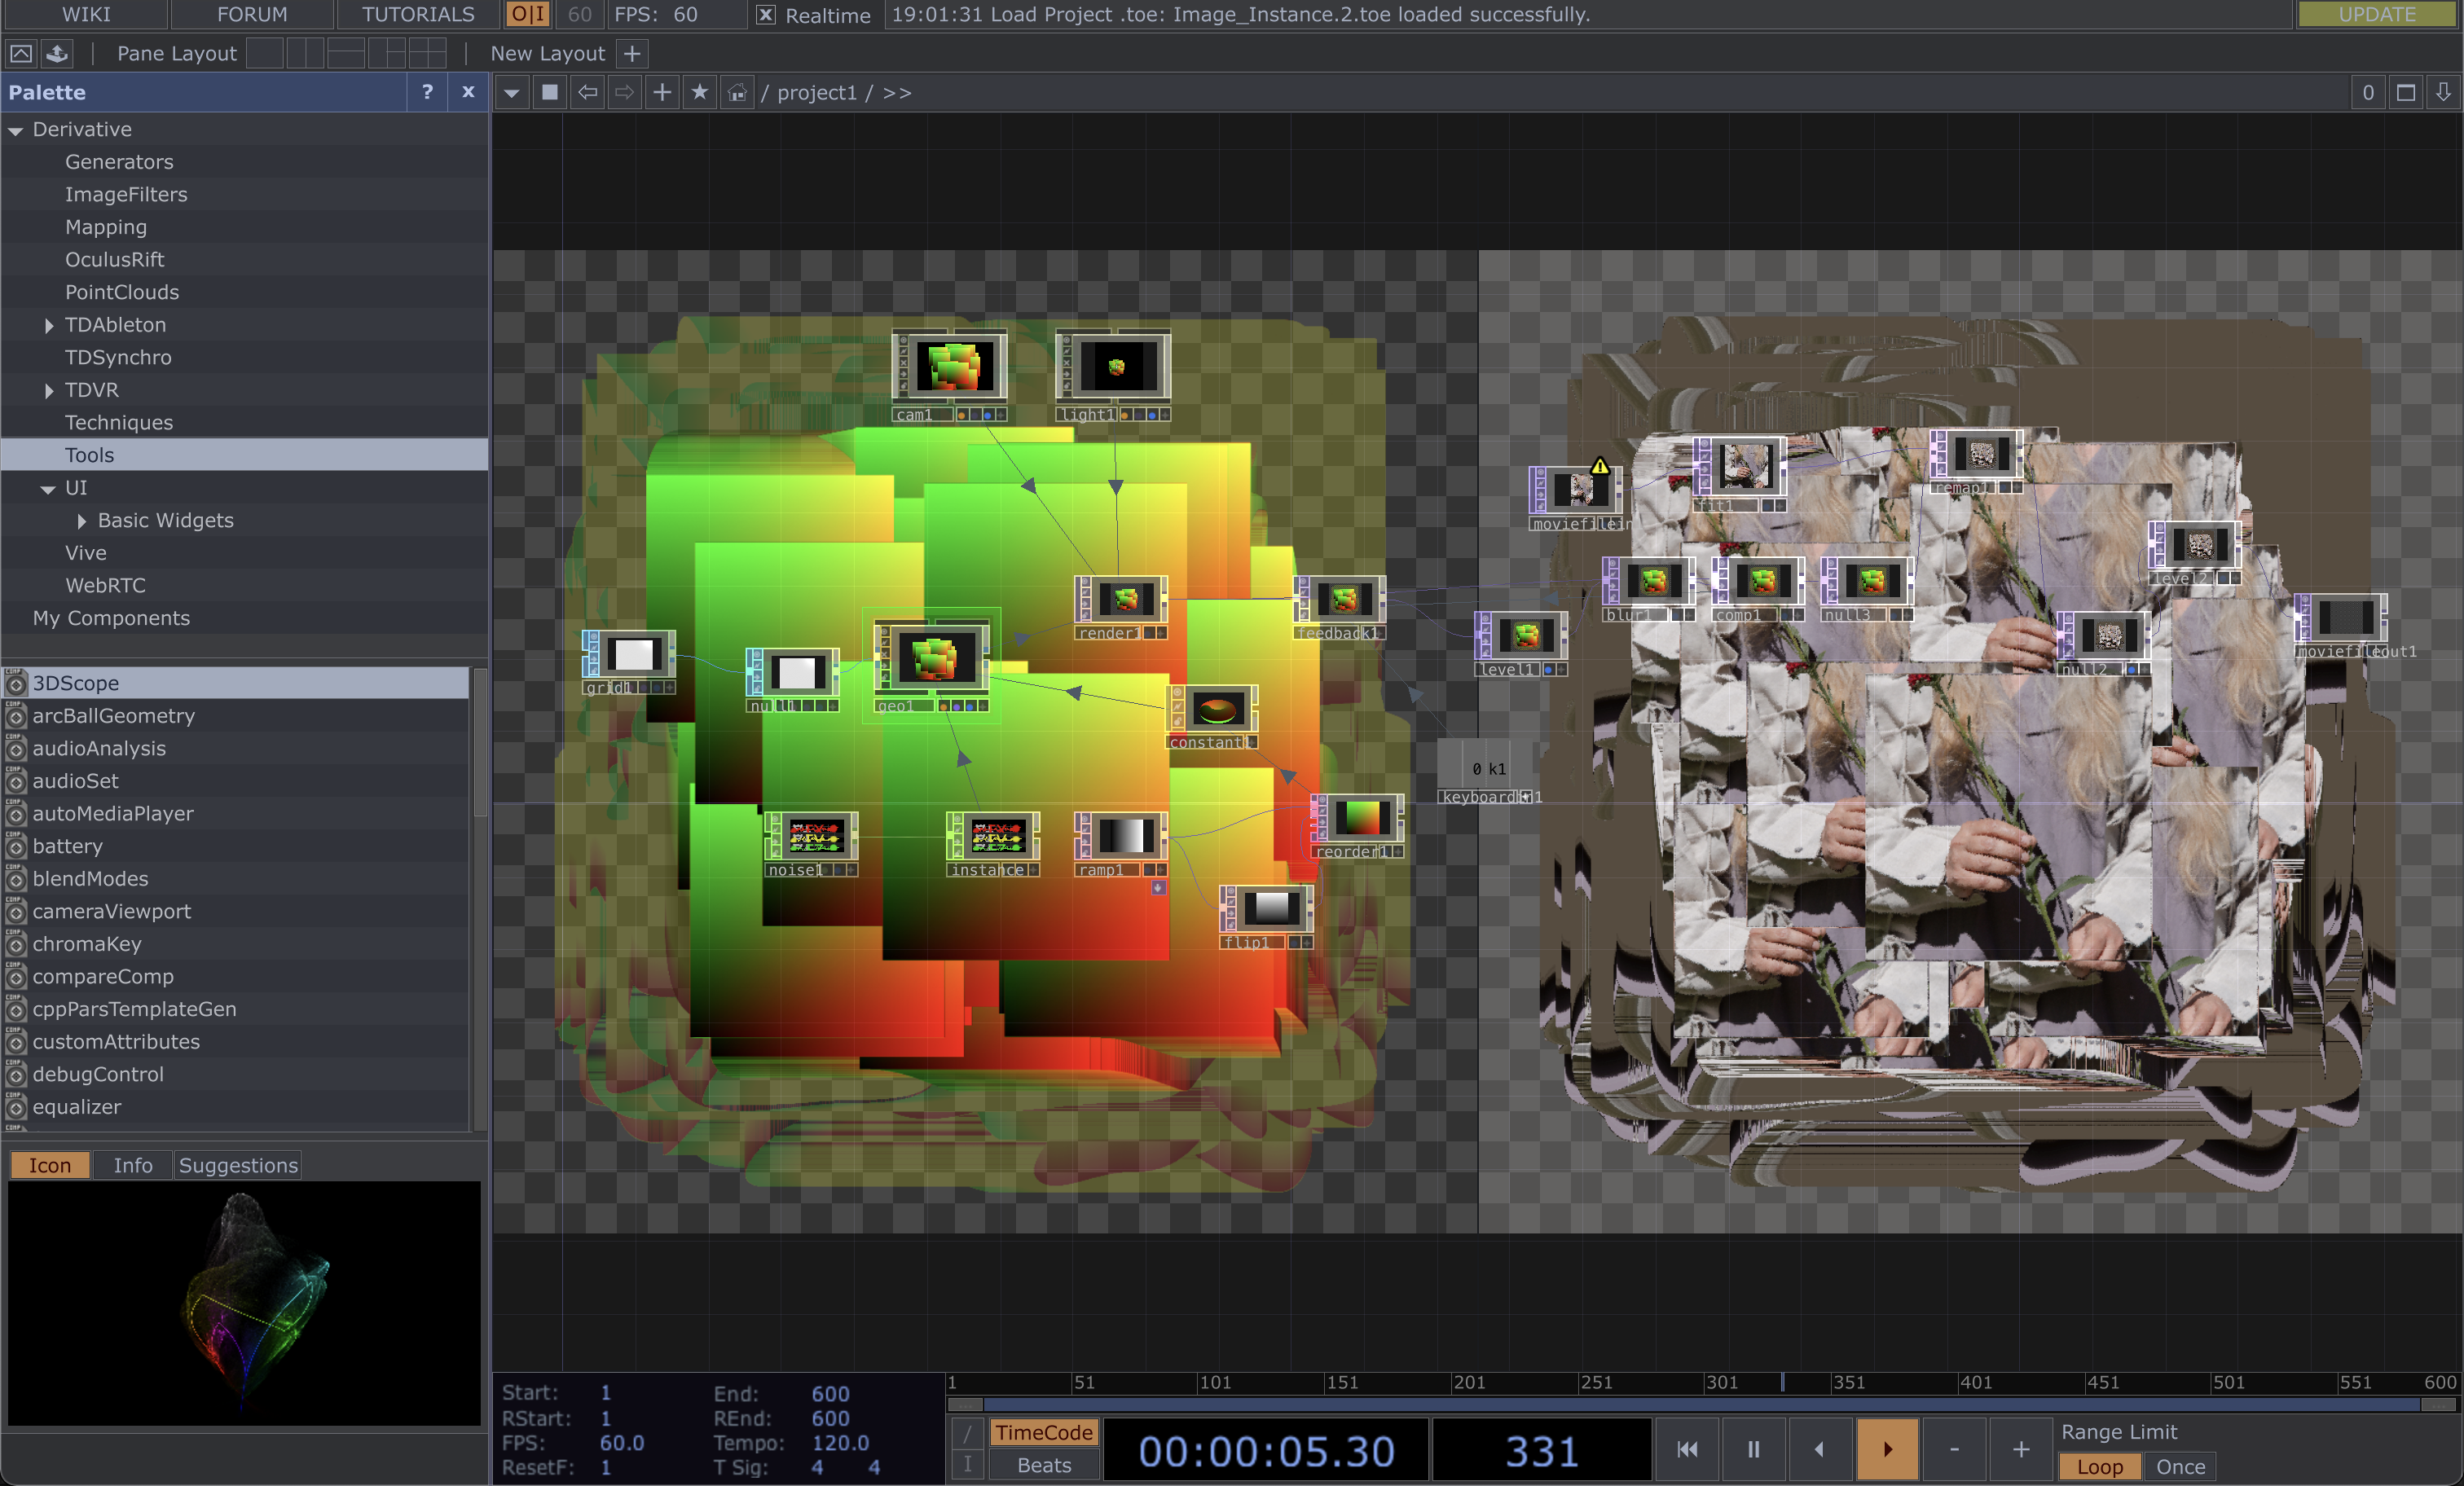
Side by side view of using Image as texture
Experiment 5 – Image Instancing with Particles
This experiment represents an extension of the previous one, where I explored the application of
instancing as a texture overlay on an image. I was intrigued by the idea of symbolizing data manipulation
in this way, so I decided to give it a try.
I must admit that I faced some challenges in comprehending the intricacies of this experiment, as it
involved a rather complex process. The approach included the use of 4 math TOPs to extract RGBA data from
the image, followed by the reordering of this data into a geometric structure. It was confusing as the
references for the values were used in seemingly specific ways that didn’t feel logical to me. The Red and
Green values were plugged into translating the x and y axis, while the Blue value was plugged into scaling
the Y axis. Does it not sound a little random?
I found limited control over this particular file, and my scope for adjustments was mostly confined to the
noise and blur operators (OPs). Nevertheless, despite these limitations, I was able to achieve a distinct
outcome compared to the tutorial. The tutorial's result had a more fluid quality, which didn't align with
my vision. To introduce a more 'aggressive' aesthetic, I decided to increase the period of the noise and
the filter size of the blur, resulting in the desired effect.
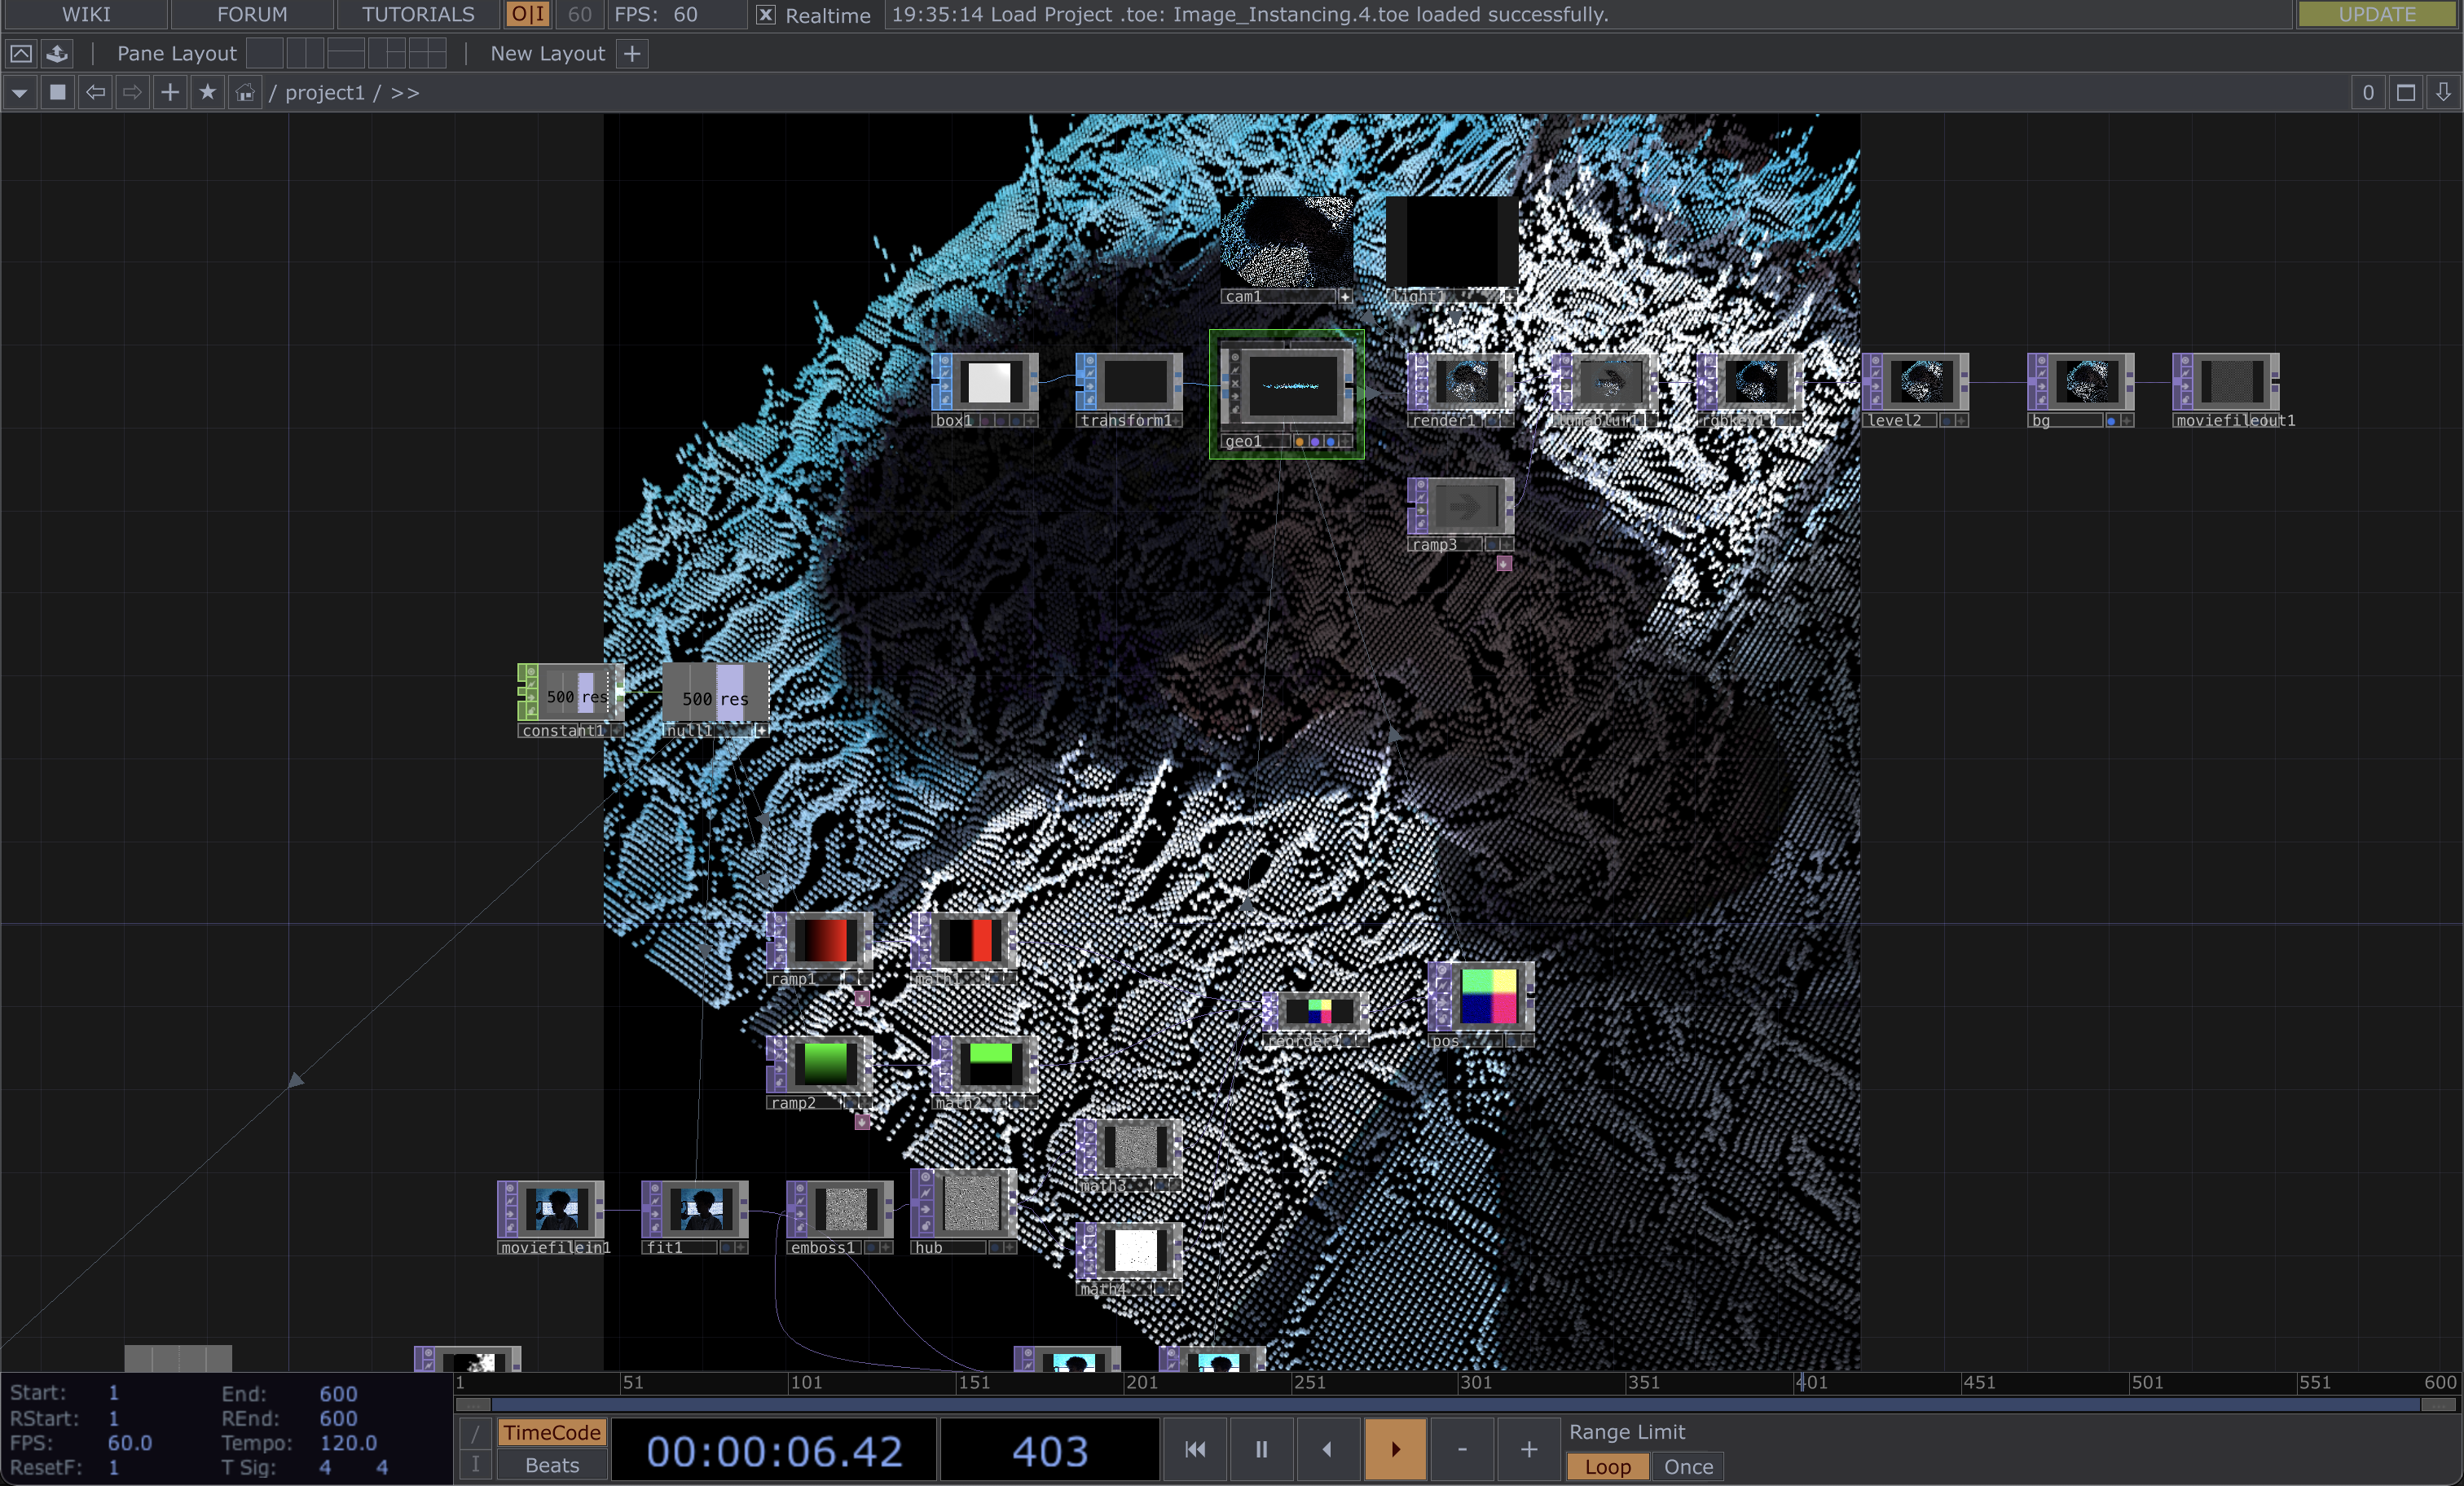
An overview of the nodes
Experiment 6 – Particle Flow
In this particular experiment, I was introduced to 'particlesGpu,' a shader-based particle system. I found
this tutorial notably more straightforward and logical to follow.
The process involved using a 'ramp' and reordering the RGB values within the ramp. We then utilized 'point
transform' to center it along the xyz axis. Subsequently, we generated particles atop this setup using
'particlesGpu,' followed by the application of a 'feedback TOP' and movement manipulation through the use
of noise.
The diverse outcomes were driven by variations in the parameters of 'particlesGpu' and noise. What piqued
my interest was the incorporation of a keyboard in CHOP, enabling the creation of keybindings for altering
the seed of the noise inputs. This added an element of interactivity that I found quite valuable.
At this juncture, my familiarity with the noise operators (OPs) was growing. A quick glance at the results
allowed me to pinpoint the necessary tweaks to either enhance the frame rate or slow down the movements. I
also noticed a significant improvement in my workflow, as I became well-versed in keyboard shortcuts, and
the file setup process felt more streamlined.
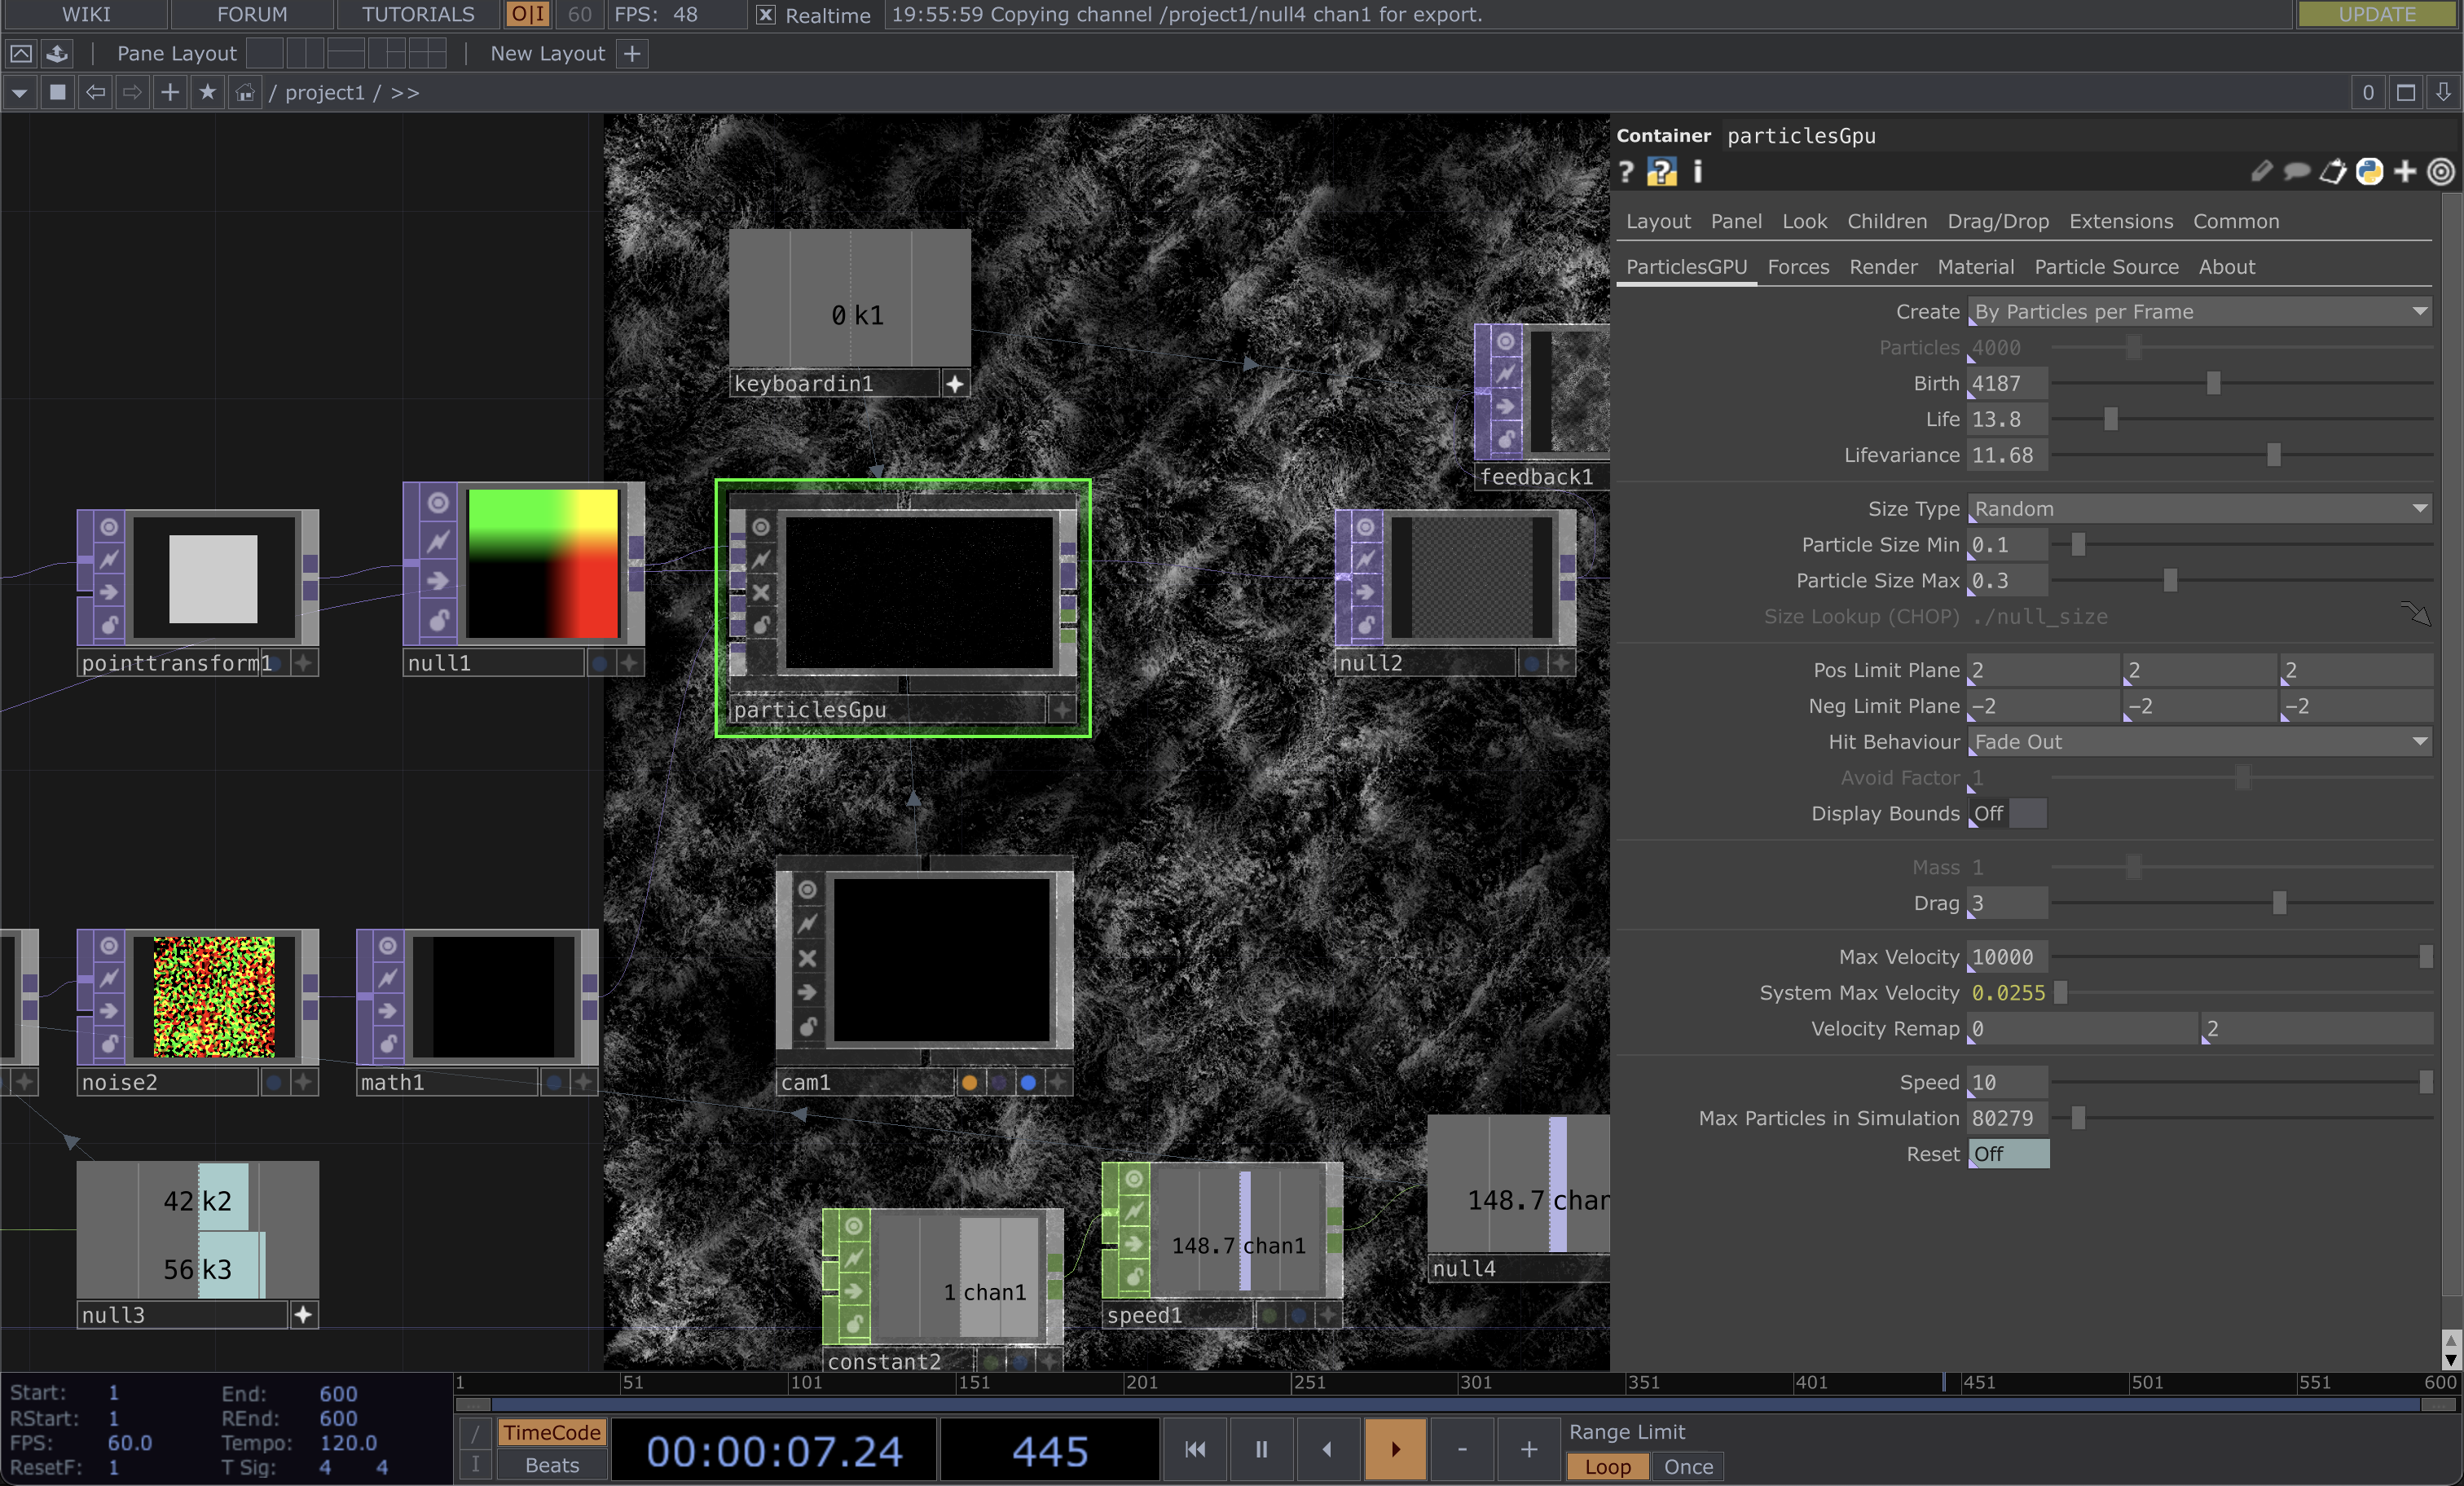
Parameters of particlesGpu
Experiment 7 – Pixel Sorting
As I explored ways to manipulate images or devise filters to symbolize data extraction and manipulation, I
encountered 'pixel sorting.' Although I'd encountered this concept numerous times while working with p5.js
in the past, this was my first time implementing it in TouchDesigner.
This endeavor also marked my initial foray into the Python coding language and the utilization of external
scripts. Setting up my VSCode required the installation of several extensions, though the tutorial didn't
provide specific guidance on this aspect. I'm proud to say that after some research, I successfully added
the module path, overcoming this initial challenge.
However, I confronted several difficulties with the code, which felt distinct from working with p5.js or
HTML/CSS. I spent about an hour troubleshooting only to realize that my functions weren't recognized due
to a missing indent. I also attempted to tackle part 2 of the tutorial but encountered insurmountable
errors, leading me to spend over two hours before seeking assistance from Andreas via email.
Given the heavy reliance on scripts, I had limited parameters to experiment with in this project. To be
honest, I didn't fully grasp the code's intricacies beyond the ability to alter the direction of pixel
sorting. Part 2 delved into more advanced experimentation, which I struggled to reach.
This experiment was considerably more complex because the creator had optimized the code, but this also
made it less beginner-friendly due to its brevity.
Up to this point, working on this experiment has been a source of frustration since my primary aim was to
achieve the visuals outlined in part 2.
Heavy reliance on Code
Programming in Python
Experiment 8 – Particle Cloud & Pseudo Plexus
I must admit that this experiment ended up as a disappointment, even though it held immense potential, and I could envision creating something akin to the work of Refik Anadol (satire).
Several factors contributed to the failure of this experiment. Firstly, it placed an excessive burden on both my CPU and GPU due to a lack of optimization in the parameters. My frame rate consistently hovered in the 10-15 range, and troubleshooting proved challenging, primarily because of my limited knowledge about the operators being used. The project featured numerous points, lines, and nodes overlapping each other, making optimization a complex task. In my efforts to troubleshoot and optimize the process, I inadvertently crashed the file.
Despite the setbacks, I was genuinely captivated by the visual elements in this tutorial and felt a sense of disappointment that I couldn't achieve them. I could already envision each layer of the constant as an image, with the lines symbolizing algorithms extracting data to recommend another image. This experience underscored the crucial lesson of optimization, reminding me to revisit my catalogue of making and optimize all my files, in consideration of sparing others from similar frustrations.

9 frames per second...